It's been WAY too long since the last update. The living room is done now. Here's how it got there.
This is the smaller of the two beams to go in. They're made the same way the others I built last year are - 2x8s with 3/4" plywood in the middle, glued and nailed every 8 inches. The truck bed is still the best work platform out there for making things like this.
It's a lot easier to put in beams when the floor is out. Termite shields went in between the piers and wood. At this point I realized it was getting a lot warmer out, so it was time to finish putting plastic down below the house. The entire ground was covered, along with the side of the crawlspace and the bottom 12-18 inches of up every pier. Then it all had to get taped together and sealed with mastic.
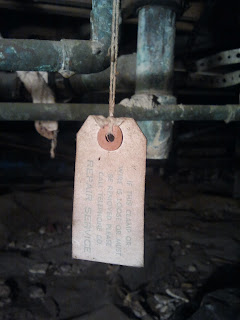
All that was every bit as fun as it sounds. The only interesting thing down there was a tag the phone company put on a cold water line and a scrap of a Korean language newspaper. It's not even that old - someone said it's part of the business section that was printed in 1992.
I have no idea what this says. The previous owner was married to someone from Korea... that's about as interesting as the story gets.
The last thing to do before finishing up the structural work was to put up blocking between the joists and fasten the hurricane/earthquake straps. Blocking made it feel a LOT more solid when I walked around, and real blocking works a lot better than small diagonal strips that I've seen use in other places around here. Don't take shortcuts because you'll notice it.
More hurricane straps...
These things tie in to the rebar that reinforces the piers about a foot deep into the concrete. They're nailed into the joists and help hold the place down. This is the kind of thing that's completely impossible to add unless you're really rebuilding your place.
While I was getting all my tools out from underneath the house I decided to check out a spot underneath the kitchen that squeaks a little when I walk on it. The plywood looks only slightly worse here than it does everywhere else. Pull on the loose pieces and...
It all crumbles into bits. That's the chipboard that someone put down in the late 1970s to put linoleum on top of. This is why I don't recommend the inspector I used - he missed all of this.
Subfloor time! Lowes sells some screws that feed into a framing nailer that made this part of the job MUCH easier. Don't bother drilling and screwing - get these instead. 1/2 inch plywood came out and 3/4 inch is going in so the floor will match up MUCH better with other parts of the house that have been worked on.
I salvaged the original hardwood and it went in back where it was. This was a lot harder than putting in new wood because it warped over time to fit whatever the dips in the flooring, but totally worth it. The long pieces are 10-12 feet long and it's hard to find anything available that size anymore and if you do, you'll pay for it.
I spent a lot of time getting the layout right before nailing anything in. There's no extra wood so there's no room for error. Bits of white paint helped locate where the baseboard and quarter round were.
The original hardwood was made by Harris. They're still around, and they have a distributor in Charleston.
It's red oak, delivered unfinished / clear grade. Neither my dog or the ones anyone had in the past has been able to scratch or dent it. I'd recommend it to anyone. The wood looks damp because there was old, dried mold on the reverse side. I cleaned it with the same bleach solution I used on the center beam. I twisted and broke off all the old nails because they're barbed and will never come out. A bench grinder helped clean up whatever metal was left over, leaving the reverse side perfectly flat.
Another shot of the wood going in... The nailer came from Harbor Freight and worked surprisingly well. For whatever reason it's hard to find a flooring nailer in stock here. Lowes / HD have good ones under $200 but neither have any around and I needed to get the floor in FAST. The only problems I ran into were where I accidentally tried nailing on top of an old nail.
Don't cheap out and use staples. Cleats are much stronger. Even with the rotten joists and subfloor the floor in this room hardly made any noise when someone would walk across it, but other areas that were remodeled only 10 years ago squeak and pop all over the place. They were put in with staples. The ridges on the cleats really help hold everything in place as the seasons change.
Getting closer...
And closer...
I had to switch to manually nailing a few rows before the end, and finish it by face nailing. Everything managed to go in exactly as before and there aren't any big gaps anywhere.
Now that the work is complete the furniture can go back in. We're refinancing so an appraiser will be out to look around sometime later this week. That was the reason behind the big push to finish up ASAP. I put in linoleup in the entry hall. Lowes had a remnant that fit the area pretty well, and now we don't have any construction project going on.
Up next, the a/c leak comes back and we start figuring out what we want for the kitchen...


