Tuesday, May 28, 2024

November 2015, it Begins!

 Two Sundays before Thanksgiving I finally got started. It was more exploratory work than large scale demo because I wanted to find out what in the world was going on with the two wall boxes at the entrance to the bedroom. The only thing I can figure is that after wiring went in someone wanted to move the switches to the other side of the room. Not like it matters a whole lot anyway, but I wanted to get it out of the way.

There's a whole lot of something going on here...

I have no idea what's going on here. Previous owners must have owned some kind of badger...

... or maybe a wolverine? Or Wolverine!

Last view of this cruddy hallway from the bedroom!

Figuring out this crud was fun... Even if you're moving the entrance to the room and the light switches you at least need to know what's going on with the existing wiring.

And sometimes it's a mess you need to do a little more!

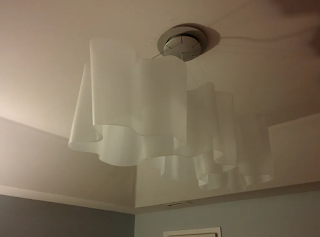
It was all worth it because a week later I was able to get the new light fixture put in. This thing is heavy so there's some pretty decent bracing up in the attic. I like it better than a ceiling fan that will never get used even if it's not the fixture I would have chosen.


Might as well do what you can with the stuff under the floor in the closet before you go to the trouble of demoing out your bedroom! The plan is to run conduit from where I want to put the electronics to the space behind the tv but that may be too much trouble.

That's where November ends, and the real fun here is about to begin!

The Great Bedroom / Bathroom Project - The Before (Part 2)

This is all of the other stuff. Closets, half baths, and all the other things.


This is my ex's side. Entering the closet, this was off to the left. The bigger side which was these two racks plus another that's very hard to see off to the left side of the picture.

This was my side. Every bit as terrible and to the right when you entered.

I took this picture from a bit farther back because the view was going to change with the hall for the half bath going away.

Same sort of thing as before but you can see where the new half bath is going in.

No lighting in there yet, so what you see is what you get!

The old half bath was small and really hard to get a picture of. Most of this area, including where I took the picture from would become the master closet.

It's hard to tell, but I think the wall behind the toilet ended up needing to move over just a bit. The little hallway separating this area from the family room was nice but did terrible things to the usefulness of the master bathroom and closet so it had to go. The washer and dryer would move from the garage to right where the toilet is.


Just a pedestal sink. nothing fancy, it just is what it is I thought they were ok until I actually had a place with one and realized there's no storage whatsoever with these.


All of this behind us, let the demo begin!

The Great Bedroom - Bathroom Project, the Before (Part 1)

Fall 2015

The nice part about "Before" posts is that there isn't a whole lot of writing involved. The bad, I took a ton of pictures and will probably have to split this one up into two posts. So time for some fun...


The Bedroom...

The view walking in to the bedroom. Not so great, the layout is exactly the same as it was the day the movers showed up with the addition of this doorway. It seems like such an obvious place for there to be one it had to have been in the original plan. Definitely looking forward to turn that long narrow closet into something actually useful.

Stuff on the floor because we went from a great house in San Antonio to here. I was still missing that place at this point.

Yep, it's a mess... never was really into this fan either. It came with a remote that did the fan + TV and VCR. Very useful in 2015!

She was pregnant with our first when these pictures were taken, about 3 months in. No way this will be done by time the baby gets here!


No storage... yep. The bathroom vanity was terrible and there was absolutely nothing else in there at all to put things, so you're on your own here.


Still can't believe there was no door between the bedroom and bathroom when we moved here. I just got lucky and found this one set out by the street nearby and it happened to fit the opening. This was the view entering the bedroom.


And the bathroom...

There's a lot to unpack here! Glass block, made around 2002 this is the most recent use I've ever seen of this as a shower surround by a huge margin. It's absolutely terrible to use because it's a mildew factory with all of those fat grout lines. Glass tends to get dingy too thanks to the soap. I didn't take a picture inside the shower because it really didn't look like much, but imagine a shower head on the visible wall and on the other. Each with its own valve, locker room style. It never really had much in the way of visible leaks but there was obvious separation at the lower corners between the tile and blocks.


So much going on here too. Track lighting never was that great because maybe due to the moisture, the lights would flicker after a while and the connection to the actual tracks renewed. There was no storage whatsoever in the shower so things tended to sit out here. Floor was difficult to keep clean, there were also no towel bars anywhere so this glass block wall was the only place to put them.

The vanity was the biggest offender. It's made from some piece of repurposed furniture and the mirror was something new. It was also too narrow to be of much use to two people whose height are 5 inches apart. Another major issue was that in order to run the drain and supply pipes there were all sorts of cuts and holes through its structure. The countertop was just the original wood without any extra finish or protectant. It was in terrible shape by now. I ended up painting the countertop black and sold it to a couple of guys for $550 so hey, their problem now! Her being very pregnant at that time really helped get full price.


Lots to see in this picture too. The wonderful vanity, and the tiny and irregularly shaped closet off the right. The toilet is just kind of in there with no actual TP holder anywhere. No real storage anywhere in the house so things were just kind of out a lot. It always looked cluttered no matter what.

And in this corner we have the bathtub. It wasn't a terrible idea except for its size. Corner tubs take up an enormous amount of space and it came at the cost of any number of things that would have made a huge improvement here. The other problem was that the pipes would build up mildew, so sometimes little black bits when the motor was run. Next to a window and made from fiberglass of some sort, there was also a fair amount of yellowing going on.

Finally, just a view from higher up for perspective. It's one of the few places I would be able to easily do an after picture from the same place

Part 2, everything else...

Monday, May 13, 2024

Planning the Next Project: Bedroom, Bathroom and More!

Backing up a little bit from the last post to the beginning of the year, planning for the bathroom started as soon as the giant kitchen + everything else project finished. Talking about ideas began even earlier when work started winding down. These are the things that happen when the topic of kids begins to come up, as if the horrible layout (and everything else!) of the existing bathroom wasn't already motivation enough to get the next big thing moving.


Here's the house as it was modeled on November 15h, 2014. Most of the work will be in the top-right corner of the house, with a little more to close off the hall that was made to access the master bedroom when the addition was built in 2002. It's no longer needed since I just opened it up to the family room.


The overhead view shows things a little better. In real life the shower was more of an L shape and bigger but this worked well enough. Windows in the master and half bath are not shown. The closet is really small and a strange shape with next to no storage, and the toilet is just out there in the open. Already mentioned the hall that was used to enter the master bedroom, the plan was to turn that area into something that's actually useful.


This is what the idea was as of January 15. Get rid of the hall to the bedroom and put the floorplan back to about what it was when the house was built. Split the long closet that was made back when I moved in by walling off the DLP TV hole from the addition the previous owners made. Half of it is accessible from the family room, the other half with double doors from the bedroom. The hamper concept was inspired by the house in San Antonio that I was *really* missing at this point. The master closet and water closet were both just kind of made from leftover space. The half bath moves to where the dartboard area was, and the plan was to add a window. I didn't like having it open directly to the family room, but it's either this or have an actual closet


I posted the layout the gardenweb (now houzz as of August) forums for advice, and all kinds of suggestions came in. Everything from moving the closet over where the tub and shower were, which I wasn't a huge fan of because the bathroom would lose its big window and all of the plumbing would have to be completely redone. To pretty much what they look like below, which is their final layout. Also a huge quality of life improvement, the washer and dryer can come in from where they were way over in the garage.

Fun fact about the whole washer/dryer in the garage thing, a squirrel can get stuck inside a washing machine when the door is left open. Also, a pair of welding gloves does a great job of protecting your hands while retrieving a squirrel from inside of a washing machine and setting it free outside!


So I finally had a plan to set out and build, minus the window in the half bath because that was going to be a lot more trouble than it was worth. Thanks to houzz we also had a pretty good idea about materials and the overall look everything should have although final material choices weren't made yet. All that was left was to take a little break to recover from the previous adventure, do the 'before' pictures and get going!