I've been busy the last couple of days. Plumbing is hooked up (that makes all plumbing work complete), the first coat of Redguard is put up in the shower, and I'm most of the way through grouting the vanity area. Not bad for a couple of day's work.
Tomorrow I plan on finishing up with the grout work, and that's about all because we have evening plans. With any luck by the end of the weekend I'll be at least partway through building the shower, which should go faster than the vanity because the tiles are much larger.
Pictures to come when there's something interesting to take a picture of!
Wednesday, March 28, 2012
Monday, March 26, 2012
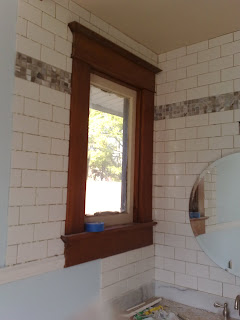
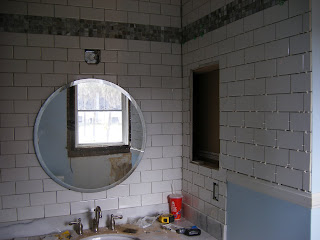
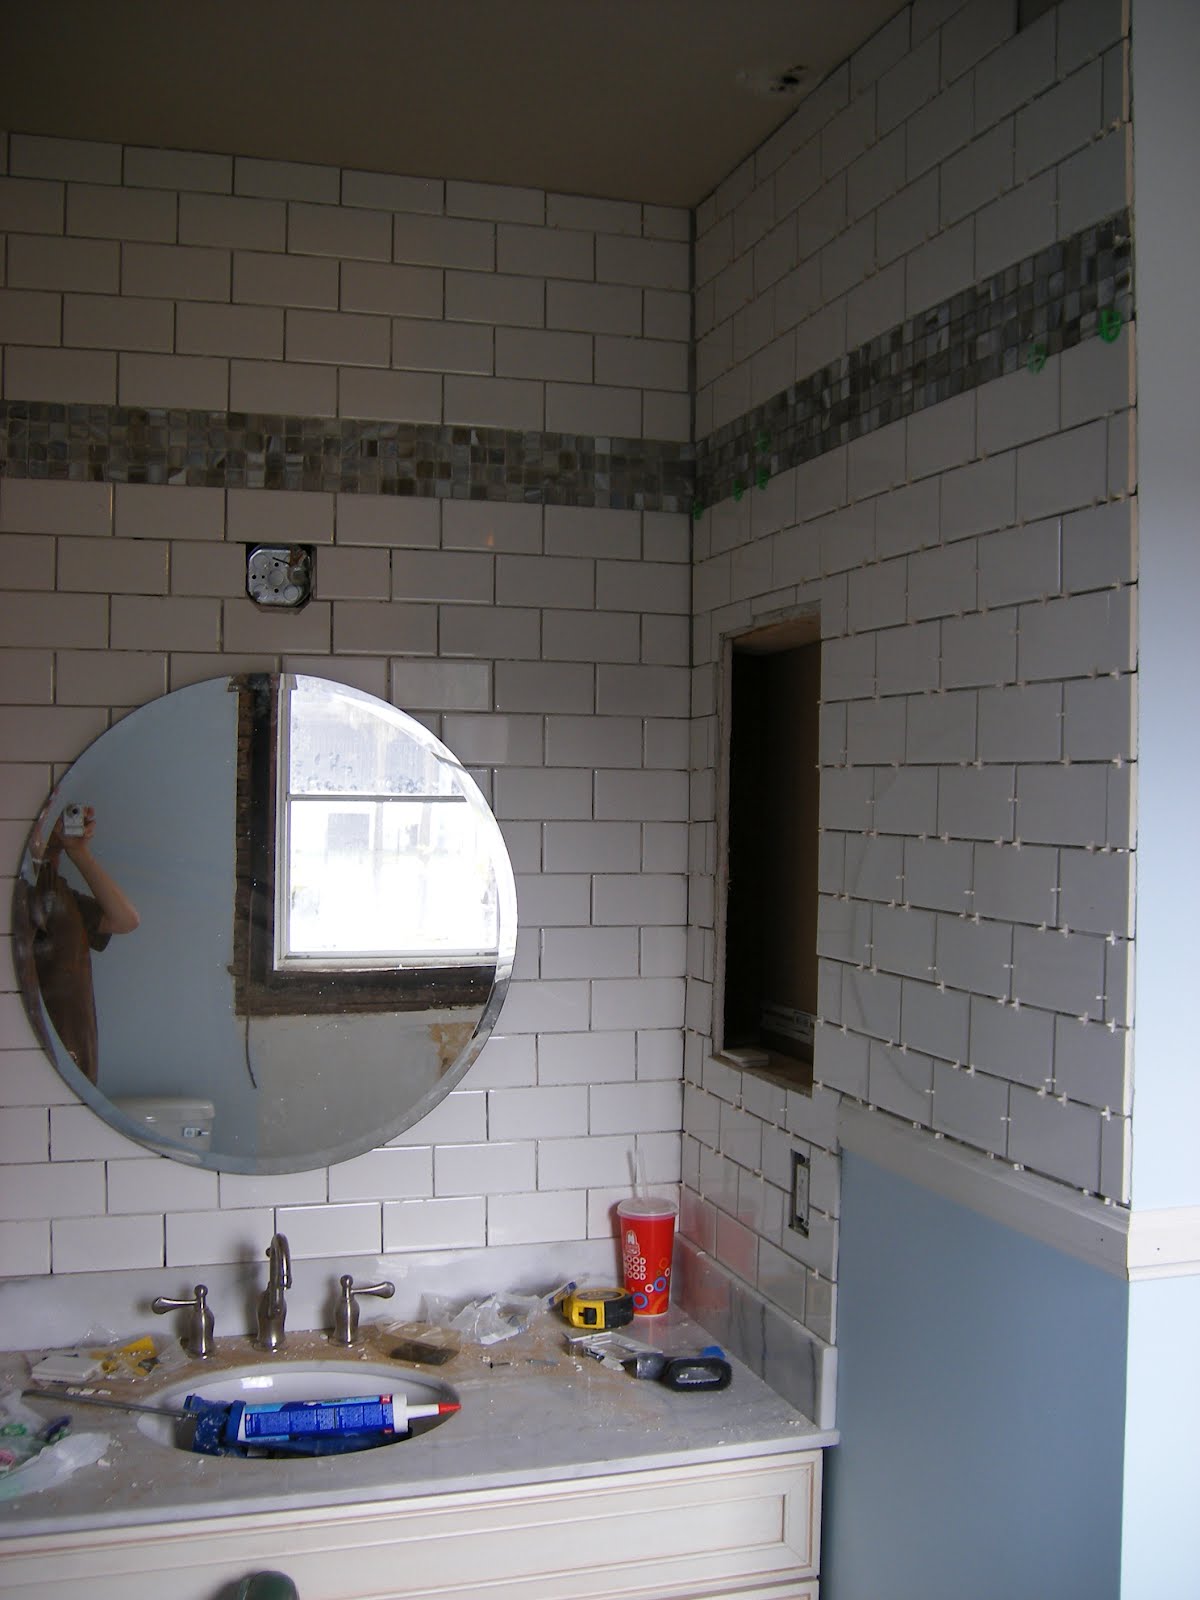
Today I used a vacation day from work to try and finish up a few things. I was able to finish ALL the tiling in the vanity area. The only tile work remaining is on the shower. Here's how the left side came out.
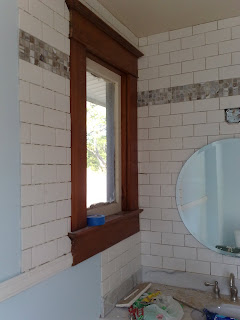
I've gotten pretty good at taking pictures that seem different when I'm over there but look remarkably similar on the computer. Tiling this area was MUCH harder than the rest, because in order to make the pattern line up I had to tile above the window, then go down. Gravity likes to move tiles around while the thinset dries, so I had a few rows taped to the ceiling. That was taking way too long, so I made a column of tiles starting from the bottom to see how they would meet, adjusted and worked my way up.
I also had to work on the transition from the bathroom to the former closet. Keeping with the reused / restored theme, I repurposed a piece of a pallet to cover the 2x4 on the ceiling. I'm building up a ledge to fill the gap between the crown molding on the bathroom side and the wood I put in. When that's complete I'm going to paint it all ceiling white.
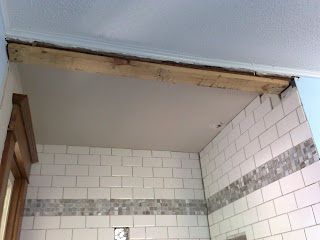
It'll look a lot better when it's finished.

This evening I rubbed down the trim that's not installed yet, so that tomorrow I can give it a couple of coats of polyurethane. It has to be done because the trim is way too close to the shower. Tomorrow I also plan on hooking up the plumbing to the sink (finally!) and redguard the shower. Within the next couple of days I'll be ready to start tiling in there. Better work on figuring out a color and pattern...

I've gotten pretty good at taking pictures that seem different when I'm over there but look remarkably similar on the computer. Tiling this area was MUCH harder than the rest, because in order to make the pattern line up I had to tile above the window, then go down. Gravity likes to move tiles around while the thinset dries, so I had a few rows taped to the ceiling. That was taking way too long, so I made a column of tiles starting from the bottom to see how they would meet, adjusted and worked my way up.

I also had to work on the transition from the bathroom to the former closet. Keeping with the reused / restored theme, I repurposed a piece of a pallet to cover the 2x4 on the ceiling. I'm building up a ledge to fill the gap between the crown molding on the bathroom side and the wood I put in. When that's complete I'm going to paint it all ceiling white.

It'll look a lot better when it's finished.

This evening I rubbed down the trim that's not installed yet, so that tomorrow I can give it a couple of coats of polyurethane. It has to be done because the trim is way too close to the shower. Tomorrow I also plan on hooking up the plumbing to the sink (finally!) and redguard the shower. Within the next couple of days I'll be ready to start tiling in there. Better work on figuring out a color and pattern...
Sunday, March 25, 2012
Sunday Progress
I spent most of the day putting up more tile. Like most things, the pictures speak for themselves.
Snowy joined me today. Here he is, wanting me to hurry up and get on the road! He's not a very good driver so I took over.

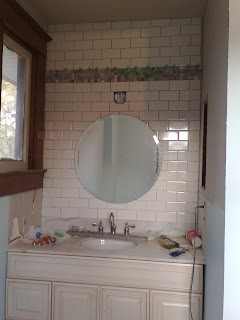
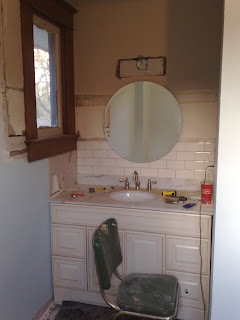
Here's what things looked like at the end of the day. I put up most of the chair rail, sidesplashes, tiled the right side of the vanity completely and a bit of the left side.

Another view of the same area...
Tomorrow I'll tile the rest of the left side. It'll be a bit of a challenge because I need to start at the top and work my way back down in order to make everything line up correctly. If I start at the bottom and go up there's no guarantee that it'll all look good where the new and old areas meet.

Since that won't take all day, I'll spend the rest of my time putting a couple of coats of polyurethane on the trim for the other window so I can get that back up. It needs to be in place when I work on tiling the shower so I know where to stop. That, a bit of random other light work and flooring are all that remain to do in the bathroom.
Snowy joined me today. Here he is, wanting me to hurry up and get on the road! He's not a very good driver so I took over.

Here's what things looked like at the end of the day. I put up most of the chair rail, sidesplashes, tiled the right side of the vanity completely and a bit of the left side.
Another view of the same area...

Tomorrow I'll tile the rest of the left side. It'll be a bit of a challenge because I need to start at the top and work my way back down in order to make everything line up correctly. If I start at the bottom and go up there's no guarantee that it'll all look good where the new and old areas meet.

Since that won't take all day, I'll spend the rest of my time putting a couple of coats of polyurethane on the trim for the other window so I can get that back up. It needs to be in place when I work on tiling the shower so I know where to stop. That, a bit of random other light work and flooring are all that remain to do in the bathroom.
Thursday, March 22, 2012
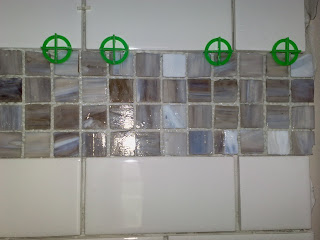
Things are still going pretty much as planned with the work. Yesterday I finished up the mosaic and tile on the first wall.
Here's a closeup of the mosaic.
Today I cut the chair rail for the right side of the vanity. I would've cut it for the left side too, but that would've made too much sense. I can't put it in quite yet, because I want it to line up neatly with the 4th row of tile throughout the area. It really serves two purposes besides being somewhat decorative. The first is, it'll cover up a couple of areas where I could've finished the drywall a bit better and the second is, I can use it as a base that I can tile up from. It's a lot easier to start tiling from the bottom, going up than it would be if I started somewhere on the wall with nothing supporting the tile from below.
I also figured out what bits I need to finish the drain for the sink. This may be a bit technical, but I'll need a U piece, a grabbing part and a tee (a trap, the piece the pipe coming from the trap attaches to, and a T fitting).
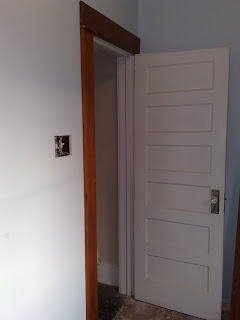
Tomorrow I won't be accomplishing much - just installing some new door hardware. The rest of the doors will still look like they do now, but at least they all will have new hardware that works and fits in with the original design.

Here's a closeup of the mosaic.

Today I cut the chair rail for the right side of the vanity. I would've cut it for the left side too, but that would've made too much sense. I can't put it in quite yet, because I want it to line up neatly with the 4th row of tile throughout the area. It really serves two purposes besides being somewhat decorative. The first is, it'll cover up a couple of areas where I could've finished the drywall a bit better and the second is, I can use it as a base that I can tile up from. It's a lot easier to start tiling from the bottom, going up than it would be if I started somewhere on the wall with nothing supporting the tile from below.
I also figured out what bits I need to finish the drain for the sink. This may be a bit technical, but I'll need a U piece, a grabbing part and a tee (a trap, the piece the pipe coming from the trap attaches to, and a T fitting).
Tomorrow I won't be accomplishing much - just installing some new door hardware. The rest of the doors will still look like they do now, but at least they all will have new hardware that works and fits in with the original design.
Tuesday, March 20, 2012
Mid-Week Update

I don't usually have a big work day in the middle of the week now that I have meetings that run late on both Tuesday and Wednesday, but today I had an exception. Instead of turning around and going home around 6:00, I stuck around until closer to 8 and was able to get 10 rows of tile in. That includes all pieces that need to be cut to fit, such as around the light or that go behind the mirror. Those are a bit more difficult once you start to get closer to the top of the mirror because each additional row of tile overhangs more space where there is nothing below it and gravity takes its toll. With some effort, creative use of spacers and a bit of blue tape I was able to keep everything straight.
Tomorrow I add the band of mosaic and tile until I reach the ceiling. In the evening I plan on sourcing a suitable replacement for the missing sidesplash (a marble door threshold, perhaps?) and with any luck I'll reach the weekend with at least a bit of work accomplished on one side of the vanity or the other. A few goals for the weekend:
- Complete all tile work that needs to happen around the vanity, get the light and med cabinet installed. Basically, be done with that area.
- Complete the drain line from the vanity
- Redguard around the shower
- Reglaze windows downstairs as appropriate, and create a couple of filler pieces to go around the new kitchen window.
- Have a coat or two of polyurethane on the window trim near the shower and have it all ready for reinstallation the following week.
In a few days we'll get to see how much of that actually gets accomplished, especially given the rain that should be moving through Saturday / Sunday.
Saturday, March 17, 2012
Pictures Only
I don't have a lot of time to write, but here are a few pictures I took of the work today.
First tile going in.

At the end of the afternoon, only four rows but I did other things besides put in tile. With any luck I'll be up to around the light by the end of Tuesday. I'm doing this wall first, then the sides. I only have one sidesplash, but I have a couple of ideas for getting a piece of marble that would work as the second.
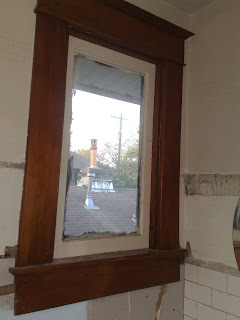
Window trim is in. This was more difficult to reinstall than I thought it'd be, and I think I need to remove just a bit of paint that got between pieces of wood and somehow shows just a bit. That'll be pretty straightforward though. I would've loved to remove the window, but I don't think that's coming out without being able to get at it from the outside and that's 20 feet up in the air.
Trim around the door also went back in today.
First tile going in.

At the end of the afternoon, only four rows but I did other things besides put in tile. With any luck I'll be up to around the light by the end of Tuesday. I'm doing this wall first, then the sides. I only have one sidesplash, but I have a couple of ideas for getting a piece of marble that would work as the second.

Window trim is in. This was more difficult to reinstall than I thought it'd be, and I think I need to remove just a bit of paint that got between pieces of wood and somehow shows just a bit. That'll be pretty straightforward though. I would've loved to remove the window, but I don't think that's coming out without being able to get at it from the outside and that's 20 feet up in the air.

Trim around the door also went back in today.

Wednesday, March 14, 2012
A Preview
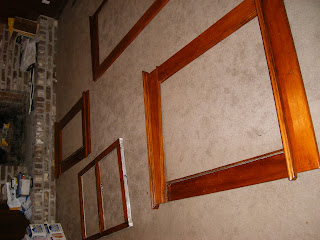
Here's a quick preview of how all the wood came out after finishing. It'll take a few days to install everything. I'm still debating on whether I want to give any of it a polyurethane topcoat. The only area that might is the window near the shower. I'd rather move the second location the shower curtain attaches to get it off the wood, but it still may be too close. It's hard to tell without being there.
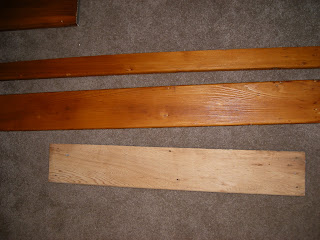
This is the windowsill by the vanity. I took a couple of pictures of the top part several posts back. It used to be in a closet, so it had at least 4 or 5 fewer coats of paint than everything else.


This is the windowsill by the vanity. I took a couple of pictures of the top part several posts back. It used to be in a closet, so it had at least 4 or 5 fewer coats of paint than everything else.

Tuesday, March 13, 2012
Mid March...
Projects at the rental house are coming along pretty well. Here's where everything stands:
The Wood:
Everything has been sanded and stripped for a while now. I've left it unfinished while I work on more important things both at the rental house and in daily life. This week I finally started to finish it. That's important because I really need to know where window trim will be in order to install tile around the vanity, and because that will let me reattach the outside window trim around the other bathroom window. That needs to be in place so painters can caulk and do their thing.
Here it is with 1 coat of shellac above / nothing below.
Three coats on the left and one coat on the right.
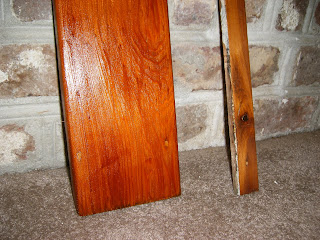
I plan on stopping with three coats and giving everything a polyurethane topcoat with a satin finish after that for water resistance. Shellac was a great choice - it gives the wood much more depth than stain and polyurethane would provide. I can see why people don't use it as much anymore though, because it takes a few (quick) coats to look really good. The high price for wood restoration makes a lot more sense now too.
The Closet:
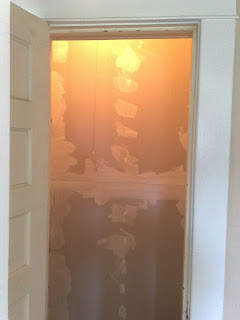
Not terribly exciting... here's what it looked like on Sunday and nothing has changed since then.
Everything Else:
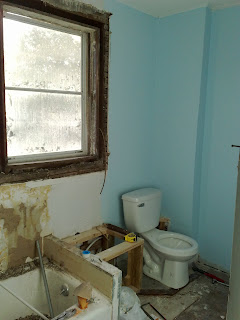
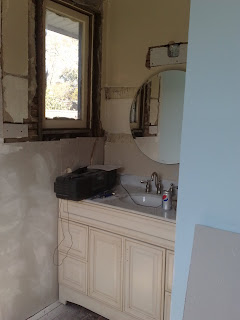
The rest of the bathroom is largely put together now, as hard as it is to believe. All that remains is to do appearance work... tile, trim, flooring and small bits like a towel bar.

I've also finished up a bit more work in other areas. The trim in the laundry room has either one or two coats of paint, depending on the area. And a new light fixture has been put in the entry room.
Also since the last update the water main broke. I turned water on at the street and heard flowing water. Behind me I saw water shooting up a couple of feet in the air. What happened was, the original galvanized water main to the house broke a year and a half ago or so. The previous owner somehow attached 1 1/4 flex PVC to the broken line, then connected it to the 1in copper line going under the house. That isn't a very tight connection so they used some plastic tubing to make up the difference and held it all together with four radiator hose clamps. I don't think any of this was done to code...
My repair was, 1 1/4 flex PVC mates up with 1in white PVC nicely, and regular PVC glue holds it together. Then I used a couple of adapters to get down to 3/4in CPVC. CPVC is on the same size scale that copper is, so I was able to use a gatorbite connector that's 3/4in on one side and 1in on the other to make the connection. Whether my repair is up to code or not, who knows but it's much stronger than what was there before.
The Wood:
Everything has been sanded and stripped for a while now. I've left it unfinished while I work on more important things both at the rental house and in daily life. This week I finally started to finish it. That's important because I really need to know where window trim will be in order to install tile around the vanity, and because that will let me reattach the outside window trim around the other bathroom window. That needs to be in place so painters can caulk and do their thing.
Here it is with 1 coat of shellac above / nothing below.

Three coats on the left and one coat on the right.

I plan on stopping with three coats and giving everything a polyurethane topcoat with a satin finish after that for water resistance. Shellac was a great choice - it gives the wood much more depth than stain and polyurethane would provide. I can see why people don't use it as much anymore though, because it takes a few (quick) coats to look really good. The high price for wood restoration makes a lot more sense now too.
The Closet:
Not terribly exciting... here's what it looked like on Sunday and nothing has changed since then.

Everything Else:
The rest of the bathroom is largely put together now, as hard as it is to believe. All that remains is to do appearance work... tile, trim, flooring and small bits like a towel bar.


I've also finished up a bit more work in other areas. The trim in the laundry room has either one or two coats of paint, depending on the area. And a new light fixture has been put in the entry room.
Also since the last update the water main broke. I turned water on at the street and heard flowing water. Behind me I saw water shooting up a couple of feet in the air. What happened was, the original galvanized water main to the house broke a year and a half ago or so. The previous owner somehow attached 1 1/4 flex PVC to the broken line, then connected it to the 1in copper line going under the house. That isn't a very tight connection so they used some plastic tubing to make up the difference and held it all together with four radiator hose clamps. I don't think any of this was done to code...
My repair was, 1 1/4 flex PVC mates up with 1in white PVC nicely, and regular PVC glue holds it together. Then I used a couple of adapters to get down to 3/4in CPVC. CPVC is on the same size scale that copper is, so I was able to use a gatorbite connector that's 3/4in on one side and 1in on the other to make the connection. Whether my repair is up to code or not, who knows but it's much stronger than what was there before.
Subscribe to:
Posts (Atom)