Monday, June 10, 2013

Living Room - DONE

It's been WAY too long since the last update. The living room is done now. Here's how it got there.


This is the smaller of the two beams to go in. They're made the same way the others I built last year are - 2x8s with 3/4" plywood in the middle, glued and nailed every 8 inches. The truck bed is still the best work platform out there for making things like this.


It's a lot easier to put in beams when the floor is out. Termite shields went in between the piers and wood. At this point I realized it was getting a lot warmer out, so it was time to finish putting plastic down below the house. The entire ground was covered, along with the side of the crawlspace and the bottom 12-18 inches of up every pier. Then it all had to get taped together and sealed with mastic.


All that was every bit as fun as it sounds. The only interesting thing down there was a tag the phone company put on a cold water line and a scrap of a Korean language newspaper. It's not even that old - someone said it's part of the business section that was printed in 1992.


I have no idea what this says. The previous owner was married to someone from Korea... that's about as interesting as the story gets.


The last thing to do before finishing up the structural work was to put up blocking between the joists and fasten the hurricane/earthquake straps. Blocking made it feel a LOT more solid when I walked around, and real blocking works a lot better than small diagonal strips that I've seen use in other places around here. Don't take shortcuts because you'll notice it.


More hurricane straps...


These things tie in to the rebar that reinforces the piers about a foot deep into the concrete. They're nailed into the joists and help hold the place down. This is the kind of thing that's completely impossible to add unless you're really rebuilding your place.


While I was getting all my tools out from underneath the house I decided to check out a spot underneath the kitchen that squeaks a little when I walk on it. The plywood looks only slightly worse  here than it does everywhere else. Pull on the loose pieces and...


It all crumbles into bits. That's the chipboard that someone put down in the late 1970s to put linoleum on top of. This is why I don't recommend the inspector I used - he missed all of this.


Subfloor time! Lowes sells some screws that feed into a framing nailer that made this part of the job MUCH easier. Don't bother drilling and screwing - get these instead. 1/2 inch plywood came out and 3/4 inch is going in so the floor will match up MUCH better with other parts of the house that have been worked on.


I salvaged the original hardwood and it went in back where it was. This was a lot harder than putting in new wood because it warped over time to fit whatever the dips in the flooring, but totally worth it. The long pieces are 10-12 feet long and it's hard to find anything available that size anymore and if you do, you'll pay for it.


I spent a lot of time getting the layout right before nailing anything in. There's no extra wood so there's no room for error. Bits of white paint helped locate where the baseboard and quarter round were.


The original hardwood was made by Harris. They're still around, and they have a distributor in Charleston.


It's red oak, delivered unfinished / clear grade. Neither my dog or the ones anyone had in the past has been able to scratch or dent it. I'd recommend it to anyone. The wood looks damp because there was old, dried mold on the reverse side. I cleaned it with the same bleach solution I used on the center beam. I twisted and broke off all the old nails because they're barbed and will never come out. A bench grinder helped clean up whatever metal was left over, leaving the reverse side perfectly flat.


Another shot of the wood going in... The nailer came from Harbor Freight and worked surprisingly well. For whatever reason it's hard to find a flooring nailer in stock here. Lowes / HD have good ones under $200 but neither have any around and I needed to get the floor in FAST. The only problems I ran  into were where I accidentally tried nailing on top of an old nail.

Don't cheap out and use staples. Cleats are much stronger. Even with the rotten joists and subfloor the floor in this room hardly made any noise when someone would walk across it, but other areas that were remodeled only 10 years ago squeak and pop all over the place. They were put in with staples. The ridges on the cleats really help hold everything in place as the seasons change.


Getting closer...


And closer... 


I had to switch to manually nailing a few rows before the end, and finish it by face nailing. Everything managed to go in exactly as before and there aren't any big gaps anywhere.


Now that the work is complete the furniture can go back in. We're refinancing so an appraiser will be out to look around sometime later this week. That was the reason behind the big push to finish up ASAP. I put in linoleup in the entry hall. Lowes had a remnant that fit the area pretty well, and now we don't have any construction project going on.

Up next, the a/c leak comes back and we start figuring out what we want for the kitchen...

Tuesday, May 7, 2013

This week's game plan...

These sort of things never seem to work out, but here's what I would LIKE to accomplish this week:

Tuesday - Build the beams for the living room and entry hall. Clean up, patch, and measure to see what size pieces of plastic sheeting will be needed to patch the vapor barrier.

Wednesday - Raise the beams and shim into place. Buy supplies needed to install vapor barrier and get to it.

Thursday - Saturday - More of the same

Sunday - Catch up on whatever didn't get accomplished earlier. If finished putting in the vapor barrier, order the dehumidifier and some car parts that I need. Add blocking in the living room and start putting in the new subfloor.

We'll see how well this goes...

Sunday, May 5, 2013

Living Room - Post 5

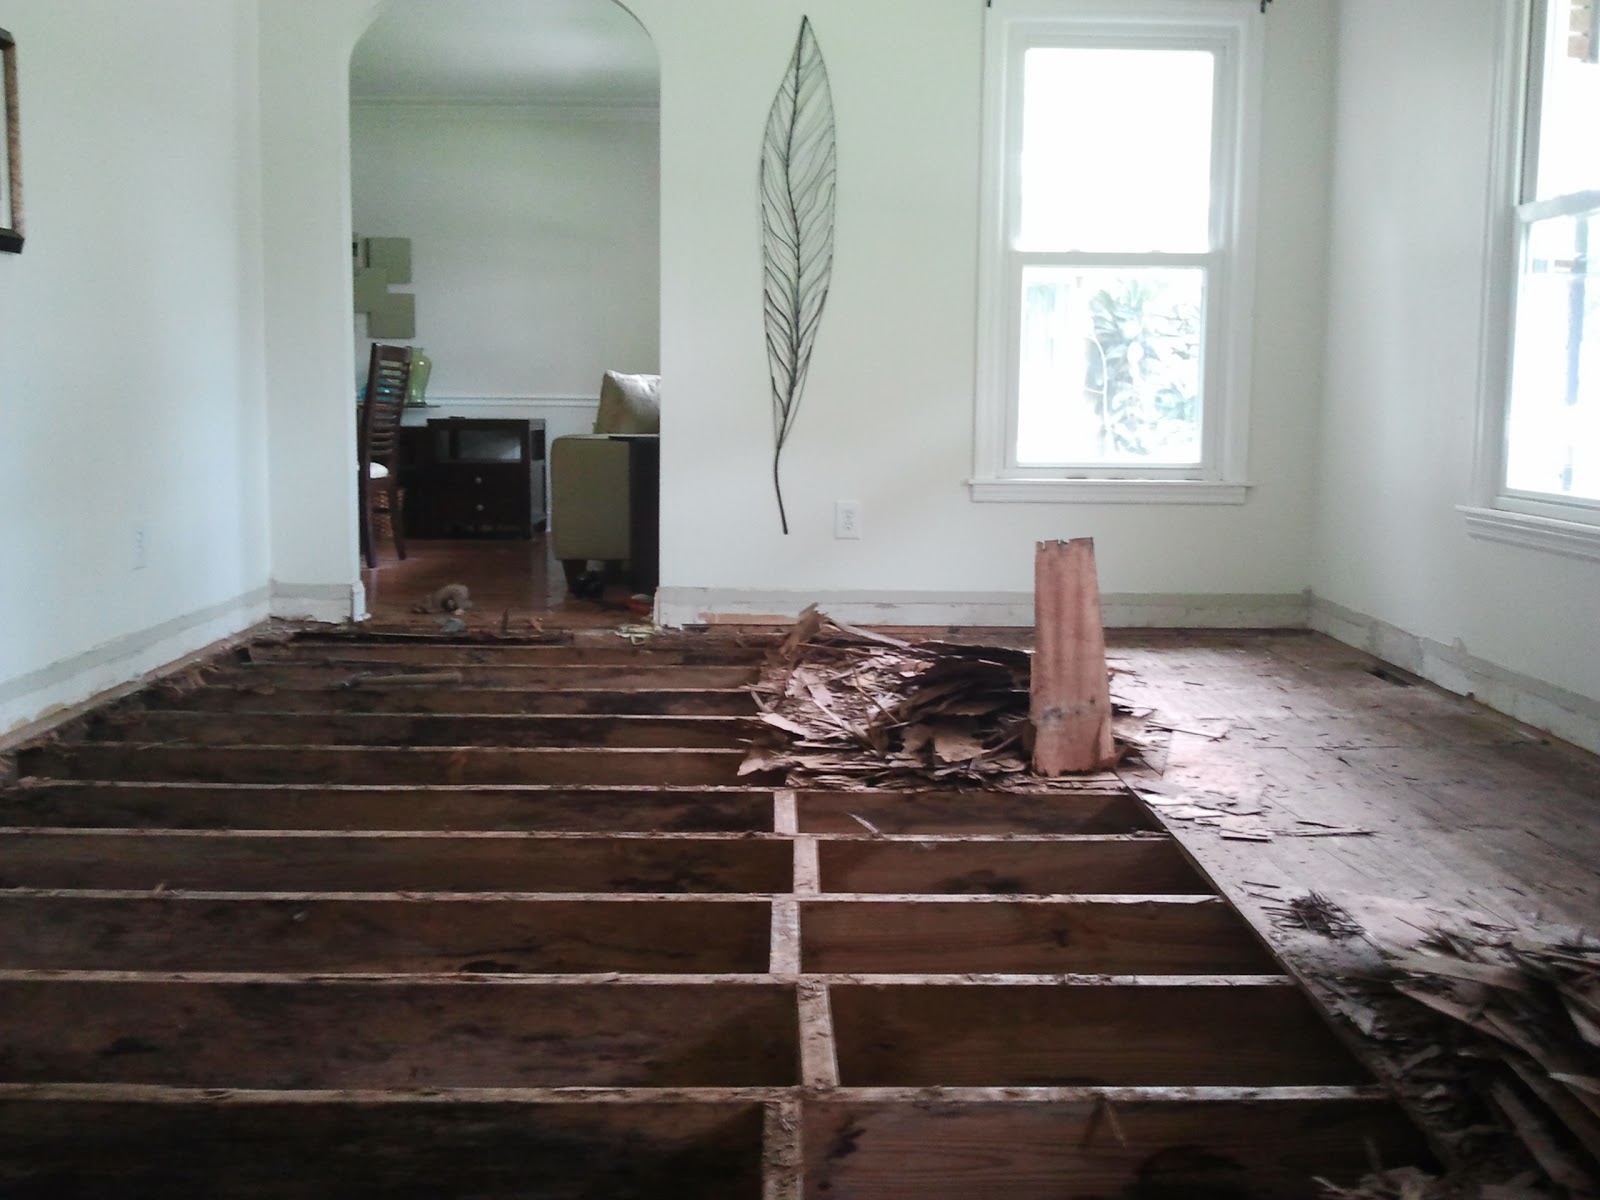
I've been pretty busy since the last post. Everything old is out and I'm most of the way through rebuilding. Here's what everything looked like once I got the wood flooring out. 


This might look solid, but I wouldn't walk on it. Even Snowy realized he might fall through the floor.


Removing the old subfloor was easy, but time consuming. It also made a huge mess. Once it came out I could finally see in good lighting just how bad the joists were.


Everything looks a lot better in this picture than it did in person. Most of them were unsound, and I managed to nearly break through two of them just from walking around.


Footings going in. They're MUCH easier to dig while standing up, using a shovel compared to the ones I dug last year with the garden trowel.


This is about the worst that the room looked. New joists are starting to go in. The first few were the hardest then it became a lot easier once I really knew what I was doing. They're all double 2x8s.


Here's an up close view of all the mold that was growing down there. It was all inactive but still made the place smell like a basement. I don't even want to know what it was like when the insulation was still around.


Using two car jacks to support the new joists going in really made life a lot easier. I could get both ends exactly where they needed to be and then put the hangers in.


Footings are also a lot easier to pour from above. I was able to wheel the concrete in and use the garden hose to add water. What used to take over an hour to do can now be done in minutes.


Here's what it all looks like now. New joists are in place, footings are in and it's time to build the piers. Those will go in tomorrow and I can put the beam in on Wednesday. I'll raise it in place the next day. Also, the plastic for the vapor barrier for the crawlspace came in the mail and I can start taking care of that this week. Looking ahead, once the plastic is in place I can put in the dehumidifier and permanently install the subfloor in this room. It's nice to be in the construction end of a project instead of the tearing up the house end, and the kitchen should go a lot faster thanks to everything I learned in here.

Friday, April 19, 2013

The Living Room - Post 4

I've gotten a lot of work done in the living room since I last wrote. I also replaced the convertible top on my car which took about 5 days. All of the demolition at home is more or less complete and I can start digging the footings and replacing the joists. 


The joists were in terrible shape so it wasn't too hard to remove the top inch, freeing up the last rows of wood flooring.


Once the first few rows were out I could come back up top and remove the rest. It wasn't hard, but time consuming. It also started smelling a lot like a basement.


It took a long time to get it all, but everything was removed without damaging anything. The wood is red oak, originally delivered plain and finished on site. It was made by Harris and surprisingly they still exist. The logo on their History page looks the same as what's stamped on the back.

There was nothing interesting under the flooring except for this. I'm not sure who made the tar paper, but their phone number was BU-45775.


This is what it all looks like with the flooring and tar paper removed. At a glance it looks dark, but pretty clean.


But looking a bit closer...


This is what it looks like up close. The subfloor has to go.


It took most of a day to get rid of the subfloor, leaving me with a nice open area to work on. Of course, the joists need to go too but that shouldn't take as long.


Here's how the living room looks now. I'll start digging footings and replacing joists tomorrow morning. With any luck I'll have all of that completed by the end of the weekend.


Saturday, April 6, 2013

The Living Room - Post 3

In case anyone is wondering, I'm dropping the "Day" count because I'm not working on this every day.

I'm almost finished removing flooring in the entry up to the center beam of the house. It actually extends a bit into the former eat in dining room-now kitchen area which is fine by me. The hardest part so far has been removing the two layers of plywood, but now that they're all up removing additional flooring won't be a problem at all.


This is what the reverse side of the top layer of plywood looks like. The top part was closest to the exterior wall where moisture wasn't an issue. In a few short feet you go from nearly dry to soaked. Everything I've removed has been dry - this is entirely the result of water condensing in the insulation and the wood transferring the moisture back up. 


This is the largest piece of the original subfloor that I was able to expose - elsewhere it crumbled into nothing when the second layer came up. It's nowhere near strong enough for anything to stand on it. Even the cat would've fallen through.


Once I reached the kitchen area I came across some SWEET linoleum from the 1970s under the tile. The scary thing about it is, the color scheme with the flooring, lighting, countertops and the fact that the cabinets were wood colored at the time actually makes sense. 30 years ago the place probably looked pretty good. This is where things became easy, because the thinset under the backer board doesn't bond at all to a flexible material like linoleum. As long as no one falls through, it looks like removing the flooring in the kitchen will almost be fun.

Underneath the linoleum is nothing - just old subfloor. There are no outlines of asbestos tile, so whatever sheet flooring was there originally is gone now.


Here is what it looks like now. The cat is probably somewhere in the crawlspace again, but Snowy has no desire to jump down there. My plan for this weekend is to pull subflooring up to the center beam, then dig the footings for however many piers need to go in under the bedrooms. If I'm lucky they'll be poured and then I can think about how I'm going to remove the hardwood in the living room.

Wednesday, April 3, 2013

The Living Room... Day Two

Today I continued taking out the short entry hallway. I thought that the saws-all blades I bought that were for wood + nails would take out backer board too, but that's definitely not the case. Maybe my nearest friendly Lowes/HD sells some better ones...


Now there's a hole in the floor about 4 feet long, running between the first two joists. I wanted to do more, but the hole is still small enough to cover with a scrap piece of plywood and it's nice to not have to worry about the cat disappearing into the crawlspace. The joists look a lot better in pictures than they do in person. All of them are getting replaced. You can easily dig in 1/4 inch into any of them so their strength has been compromised - not to mention the fact that they're covered in dried mold from ages ago. They all need to go.

It's a lot safer (translation: less scary) to hold a camera down into the hole and take pictures of what's going on down there...


View looking forward towards the front door


View looking to the right, towards the original bedrooms. I knew there was one location with improper foundation repair, but wasn't expecting two (or more?). It looks like the beam I'm adding under the living room will need to extend to the end of the house. Not fun... I was hoping that my days of digging piers from underneath the place were done but by my count I get to dig four more.


View looking left towards the living room. I'll be spending time under this room, pulling out the rotten subfloor in an attempt to remove the flooring in there without damaging it.


View looking back towards the kitchen and addition. The main beam is visible in this picture, along with a vent for the cooktop. I plan on venting the new cooktop through the roof instead.


Another view of the hole I cut... Hopefully the entire area will be cleared soon. In light of the extra foundation work I get to do I'm not sure what I'll work on after the hallway. I'm tempted to dig the extra footings now while the weather is still nice though.

Tuesday, April 2, 2013

The Living Room - Day One

I still have more work to do on the cars, but at this point I'm waiting on parts to come in or help to install them. Rather than waste a day I decided to get started on the entry way. If nothing else I could get the tile removal out of the way and see what condition everything below is in.


The tile never stood a chance. The cement board extended to 4 inches from the end of the tile. There was no adhesion after that point. Never apply tile directly to hardwood flooring...


One thing I quickly noticed was that when I tried to lever with the bar against a tile to remove it, more often than not the bar sank into the top layer of 3/4" plywood. Things must be seriously bad in order for that to be rotten. It looks like something that was installed when the tile was around 2002.


Here you can see the cement board, the light colored plywood underneath, and below that the original, gray plywood subfloor. This stuff can't support weight of any kind and I had to cover the area with new plywood so no one will fall into the crawlspace below.


The mold problems were so bad that it grew up in between the pieces of backer board to get at the thinset used to install the tile. I pulled up enough pieces of the three types of subfloor to get an idea of what I'm dealing with, and I'm leaving the rest for a few days from now when I'll just take it all out with a saws-all. This should be EASY to do. The only major issue I see with the living room will be removing and numbering pieces of the hardwood flooring. Beyond that the structural work is straightforward. Remove the subfloor, install new piers, the beam and new joists and then install good quality vapor barrier in the crawl space before putting in new subfloor material.

At that point the plan is to move on to wiring, then I get to take on the kitchen... Pictures are going to start getting really interesting from this point onward.